Cooking instructions
- Start by activating the yeast. Put the contents of the sachet into the bowl of your stand mixer and add the sugar and 110ml warm water. Mix them together a bit with a spoon then leave it alone for about 5 minutes, until the yeast begins to bubble. This is how you know that it is beginning to work.
- While the yeast is doing its thing, take the zest off the orange with a fine grater, being careful not to go too deep – it’s the zingy orange bits you are after rather than the bitter pith.
- Next, add the flour and orange zest to the bowl and put it into the mixer fitted with the dough hook.
- Turn it on and mix until it comes together in a dough – about 5 minutes. If the dough looks and feels a bit dry, sprinkle in a little more water until a ball forms and continue to knead for 5 minutes. If you don’t have a stand mixer, you can do this by hand – it’s a good work out!
- Grease a medium-sized mixing bowl with a little oil and put the ball of dough into it then cover it tightly with cling film and leave it to prove in a draught-free area of the kitchen. The dough needs to prove for 30 to 45 minutes until it has doubled in size.
- Heat your oven to 200˚C/180˚C fan/gas mark 6. Line a baking tray with a piece of baking paper.
- Dust the work top with flour (mums and dads really love it when you start sprinkling flour around but hey, it has to be done if you don’t want your dough to stick). Knock back the dough and turn it out on to the floury surface then knead it by hand for a few minutes.
- Divide the dough into 8 pieces and shape each one into a 20cm long wand. Put the wands side by side on the lined baking tray, spaced apart.
- Brush the wands with the milk (or veg oil if you want to go dairy-free) and sprinkle with sea salt flakes if you want.
- Put the tray into the oven to cook for 15 to 20 minutes until golden brown on top and hollow-sounding if you tap them on the underside.
- Allow them to cool completely (on a rack with some baking paper underneath or directly on a sheet of baking paper) before decorating them, or the chocolate won’t set.
For the chocolate coating
- Put a saucepan on to the hob and add some water so that it comes about 5cm up the side of the pan. Bring the water up to the boil then turn the heat right down so it is simmering gently.
- Break the milk chocolate into small pieces and put it into the heatproof bowl then place the bowl on top of the saucepan until the chocolate has completely melted, stirring from time to time. Make sure the bottom of the bowl isn’t actually touching the hot water though, as this could cause the chocolate to overheat. You can also melt the chocolate in a microwave – see my tip for how to do this.
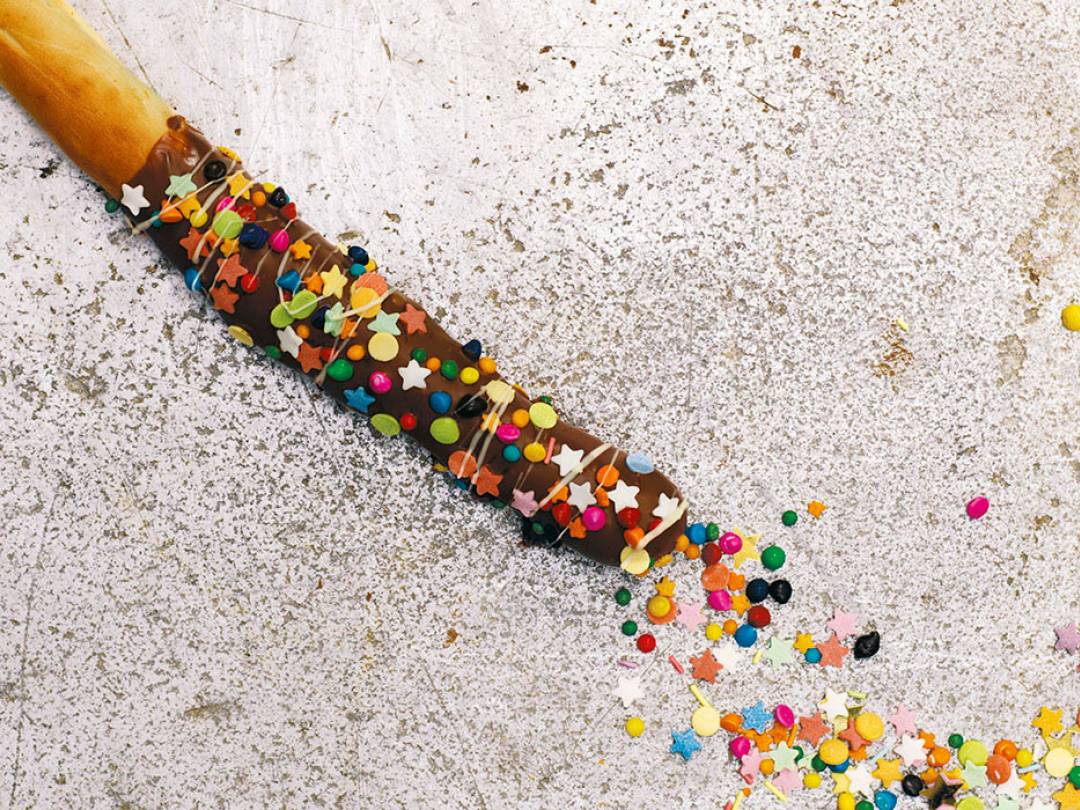
- Pour the melted milk chocolate into a shallow tray (a baking tray works well) and dip the wands into the chocolate to coat them all over, leaving enough uncovered at one end so you can hold them. Put them on a lined baking tray. Sprinkle the wands with coloured sprinkles then leave them to set at room temperature.
- While they are cooling, melt the white chocolate as above. Drizzle the wands with the white chocolate in a zig zag pattern.
- Leave them to set for a few more minutes before serving.
Make Ahead Alert
The dough needs to prove for 30 to 45 minutes and the cooked wands need to cool.
Extracted from Matilda & The Ramsay Bunch: Tilly’s Kitchen Takeover by Tilly Ramsay